New Features

Omen Windows are a new random encounter that you’ll find throughout the world of Eterra. This is a horde-based mechanic that you can encounter both in the Campaign and the Monolith where you will face Omens and Fractured enemies that the Omen will empower.
Encounter Basics
- These windows can spawn in either endgame or campaign, starting as early as Chapter 2. Simply entering the window area will cause the encounter to begin.
- At the start of the encounter, the Omen is invincible. During this first phase, the Traveler must defeat Fractured enemies while remaining inside a ring.
- Leaving the ring will cause a 10-second countdown to begin, and the Traveler will fail the encounter if that countdown reaches zero. Re-entering the ring will cause the countdown to slowly increase back to 10 seconds.
- As the Traveler kills Fractured enemies, a progress bar at the bottom of the screen will fill up.
- Phase 2 will begin when the bar is full; the Omen will consume the remaining Fractured enemies to empower itself and will become vulnerable to damage.
- After defeating the Omen, loot will drop, including a new currency and items. The list of possible rewards is:
- Timeglass Fragments
- Runes of Corruption
- Corrupted items
- Omen Idols
- Idol Altars
- Omen Windows come in several tiers of difficulty, gradually increasing throughout the Traveler’s time in Eterra.
- Higher tiers drop more Timeglass Fragments and loot, as well as having increased chances to drop rare Idol Altars.
- Greater Omen Windows spawn at the end of Omen Window Echo Chains in the Monolith of Fate, with more challenging enemies in Phase 1 and two Omens to defeat in Phase 2.
- When a Greater Omen Window is completed, a Timeglass Core will form. Interacting with the core will give the Traveler the choice to either spend Timeglass Fragments, to spawn an Echo Chain of their choice, or to shatter it to gain additional Timeglass Fragments.
- Timeglass Fragments
- These are a new currency that can be exchanged for various rewards such as Runes of Corruption, Omen’s Veil Woven Echo, crates of corrupted items, and more.
- Timeglass Fragments can be spent by talking with Apophis at the center of the Monolith of Fate.
- There are new Omen related Prophecies and Weaver Tree nodes, as well.
Echo Chains
The Monolith web now sometimes spawns a chain of special Echoes. Season 4 is launching with five types of Echo Chains that focus on specific rewards or types of content.
- High Stability Chains
- These Echo Chains will reward the Traveler with much more timeline stability than standard Echoes.
- Nemesis Chains
- Nemesis Chains guarantee a Nemesis encounter in each Echo and end in a Conquered Tower.
- Rift Beast Chains
- Rift Beast Chains guarantees that each Echo’s objective will be to slay a Rift Beast, leading up to a new Echo, Primeval Cascade, featuring multiple Rift Beasts that will try to ambush you.
- Omen Window Chains
- Each Echo is guaranteed to contain an Omen Window, and the last Echo will instead have a Greater Omen Window as the Echo objective. Additionally, the last Echo will also contain a roaming Omen for each previous Echo in the chain that was completed on the first attempt.
- Pinnacle of Chaos Chains
- Each Echo is guaranteed to contain an Omen Window and a roaming Omen. The chain ends in the Pinnacle of Chaos, an Omen Window encounter filled with Champions instead of regular enemies.
After completing an Echo in a chain (except for the last one), there is a new portal next to the Monolith rock that takes you straight to the next Echo in the chain without having to inspect the Echo web.
Additionally, there are new Weaver Tree nodes that can alter the spawning behavior of Echo Chains, detailed in the section on the Woven faction below.
Runes of Corruption and Corrupted Items
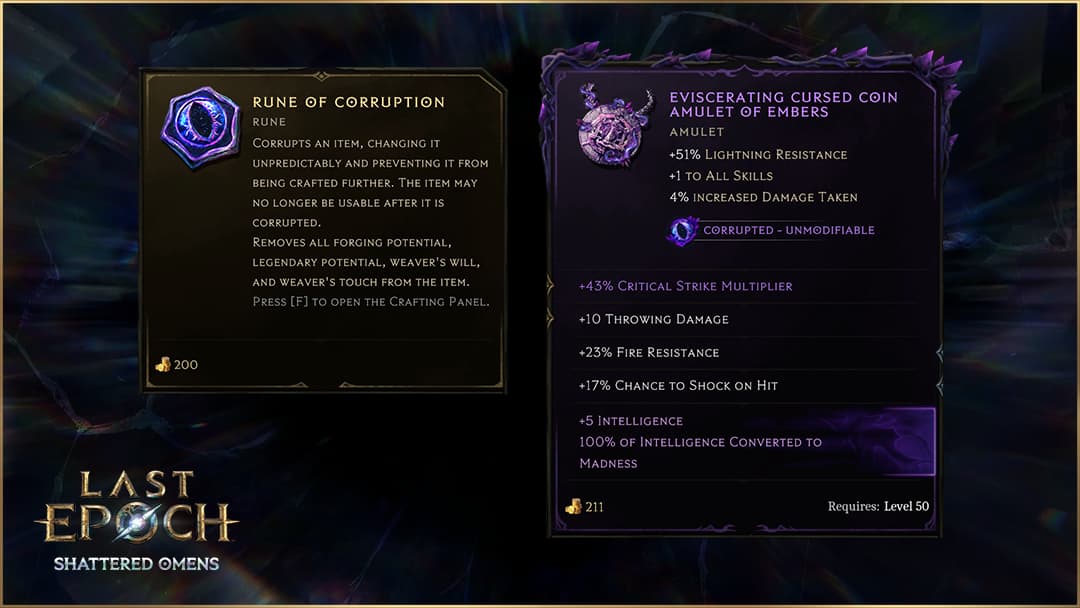
- As mentioned previously, Runes of Corruption drop from defeated Omens.
- Like other Runes, this is used in the Forge to modify equipment.
- After corrupting an item, it will no longer be modifiable in any way.
- The only actions you can take with a corrupted item if you no longer have any use for it are to shatter the item for affixes, sacrifice it at the Sacrificial Altar, sell it, or keep it as a memento from your item journey. Well, as long as the item didn’t become ruined. If that happens the only options are to sell it or keep it as a memento.
- During forging, Runes of Corruption have the potential to either make the item better or worse. In some cases the corruption can even turn the item to an entirely new subtypes only obtainable through corruption. The following are things that can happen when you corrupt an item:
- Changing affix tiers or values.
- Adding or removing affixes.
- Changing the rarity of the item.
- Changing subtypes.
- Making the item unequippable.
- Amulet corruptions can convert existing attributes to new corrupted attributes with a new effect. So instead of Intelligence providing 2% Ward Retention, you could have all your Intelligence converted to Madness, which would have different effects. Below is a list of corrupted attributes and their effects:
- Vitality converts to Rampancy:
- 3% increased effectiveness of Frenzy per point.
- 0.1% more damage taken while you don’t have Frenzy per point.
- Strength converts to Brutality:
- 0.02% more damage for melee attacks per 1 Mana cost (up to max 20, multiplicative with other modifiers) per point with other modifiers) per point.
- Dev Note: “In the second day of the Hype Week, we showcased the new corrupted attribute Brutality granting 0.05% more damage for melee attacks per mana cost (up to 20). We have since lowered the value to 0.02% due to it being too powerful while having a downside that is relatively easy to play around. Previously at 100 Brutality, a 20 mana cost attack would’ve gained 100% more damage, with the lowered value it will not instead gain 40% more damage.”
- Globally reduces Health Leech by 0.5% per point.
- 0.02% more damage for melee attacks per 1 Mana cost (up to max 20, multiplicative with other modifiers) per point with other modifiers) per point.
- Dexterity converts to Guile:
- 0.3% cooldown recovery speed for movement skills per point.
- 1% reduced armor per point.
- Intelligence converts to Madness:
- 1% Spell Critical Multiplier per point.
- 1% increased bonus damage taken from critical strikes per point.
- Attunement converts to Apathy:
- 2% increased Mana Regeneration per point
- 0.2% of Current Health lost when you directly use a skill per point.
- Vitality converts to Rampancy:
- New Corrupted Subtypes: There are some new item subtypes we are adding to Season 4 that can only be acquired while corrupting items. Whenever you are corrupting relics, the Class required on the relic will not change.
- Singularity Belt: Only has one potion slot by default, but restores an Evade charge when you use a potion.
- Corruption Binding: Has 8 potion slots by default, but reduces health gained on potion use by 31-37%.
- Deadstar Amulet: Gives 20-24% less damage over time taken, increases your damage over time by 42-60%, but reduces armor by 42-60%.
- Cursed Coin Amulet: Gives 51-83% Lightning Resistance, and +1 to all skills, but 4-5% increased damage taken.
- Corrupted Insignia: Gives 13-19% increased cooldown recovery speed for Evade, 3-4 seconds of Frenzy after you use Evade, but 6-7% increased damage taken while you have Frenzy.
- Opal Eye Ring: Gives 6-10% increased cooldown recovery speed, and 6-7 to all attributes, but reduces movement speed by 6-7%.
- Timeglass Chalice: Non-class specific Relic that grants 23-31 Mana and 23-31% increased Mana regen, but reduces health regen by 31-47%
- Doom Gourd: Primalist Relic that adds 11-17 Minion Melee Void Damage and Minion Spell Void Damage, but reduces Minion Physical Resistance by 11-17%.
- Aberrant Eye: Mage Relic that grants 7-13 Ward per second, and 11-13% of Maximum Health gained as Ward decay threshold, but reduces health by 7-9%.
- Apocalypse Code: Sentinel Relic that grants 13-17% Physical and Void penetration, but reduces health by 5-7%.
- Prophetic Homonculus: Acolyte Relic that grants 61-77% Necrotic and Void Resistance, but reduces armor by 37-47%.
- Bottled Time: Rogue Relic that grants 6-12% increased movement speed and cooldown recovery speed, but increases damage over time taken by 12-24%.
Idol Altars and Omen Idols
Idol Altars are a new type of item that can slot above your Idol Grid and will change the layout of that grid.
- They have affixes which affect Idols you have equipped and change the layout of the Idol Grid itself.
- When you have an Idol Altar equipped, you will find new Refracted Idol slots with a purple background, which grant unique bonuses to Idols in those slots.
Omen Idols are a new type of Idol that drop already corrupted.
- They are 1x3 or 3x1 and can gainthe affixes otherwise reserved for larger class Idols.
- By default, you can only have a single Omen Idol equipped at a time, but some Idol Altars will grant higher limits.
Both Idol Altars and Omen Idols drop from Omen Window encounters.
Two New Woven Echoes
Omen’s Veil
- This Woven Echo contains 3 regular Omen Windows. Instead of just granting rewards like regular Omen Windows, each successfully completed Window becomes a Timeglass Core after all three are completed (or failed).
- These Omen Windows can be active simultaneously.
- This can be purchased from Apophis in exchange for Timeglass Fragments
- Minimum Corruption: 100
Fractured Prison
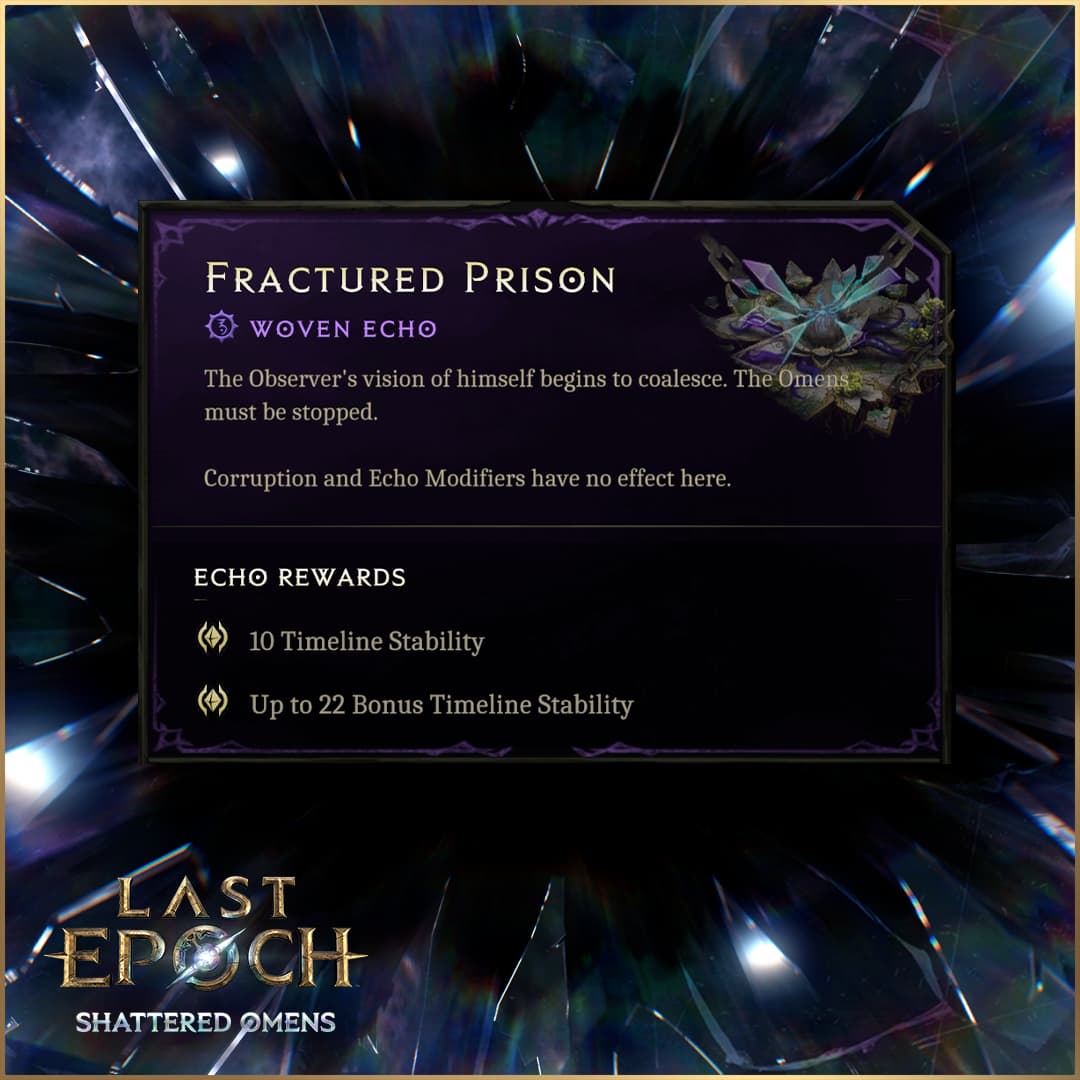
- Challenge an empowered version of Shade of Orobyss. He is supported by each of the different Omens, one at a time.
- Obtainable as a drop when completing Omen’s Veil Woven Echo if, at any point, all 3 windows were active at the same time, and you Manage to successfully complete all 3.
- Corruption and Echo modifiers have no effect here.
- Minimum Corruption: 400
New Uniques & Set Items
In Season 4, there are 9 new Uniques and 15 new Set Items across 6 new Sets.
Two New Rogue Skills
Bladestorm
Bladestorm is a devastating area-of-effect ability that creates spinning blades at a target location. Bladestorm was previously a very popular subskill of Umbral Blades that we felt deserved to be its own skill entirely.
- Base behavior of Bladestorm is as follows:
- Throw spinning blades towards the target location where they will hit nearby enemies 3 times per second.
- Bladestorms last 4 seconds.
- You can have a maximum of 3 Bladestorms active at once, but each enemy can only take damage from one at a time.
- Added damage applies at 150% effectiveness to each hit.
- Bladestorms have 40% less chance to apply ailments on hit.
- 18 Mana cost.
- Tree Nodes:
- Efficient Manufacturing: 15% increased duration and -1 Mana cost per point. Max 3 points.
- Slagstorm: Each Umbral Blade thrown into a Bladestorm is destroyed upon landing to grant the Bladestorm 3% more damage and radius for 4 seconds, up to 40 stacks.
- Magnetic Grip: Bladestorms slowly seek out enemies, moving at 3 meters per second (from 2 meters per second as the previous Loathing node in Umbral Blades)
- Alloy Animation: Bladestorms have 100% more movement speed, 20% increased duration, and 50% increased Mana cost. Multiple Bladestorms can now hit the same target simultaneously. -1 max Bladestorms.
- Hurricane: Bladestorms have 1% increased movement speed per 1 Dexterity.
- Razorain: Direct casts of Bladestorm throw up to your maximum number of Bladestorms in a spread in front of you. +10 Mana cost.
- Momentum: Shifting through a Bladestorm grants it 150% more movement speed per point for 1 second. Max 2 points.
- Blade Frenzy: Each Bladestorm created grants 1 stack of Blade Frenzy per point. Your next direct cast of Shurikens or Umbral Blades consumes all stacks for +8 throwing damage and +1 projectile thrown per stack. Max 6 stacks. Max 2 points.
- High Carbon Steel: +25% armor shred chance per point. Max 4 points.
- Shuriken Storm: Bladestorms cast Shurikens every 1.5 seconds at enemies within 10 meters of them, consuming 4 Mana or Shurikens’ Mana cost, whichever is higher. This effect is only active while you are above half Mana.
- Surge of Steel: Bladestorms cast Shurikens with 12% increased frequency per point. Max 4 points.
- Shattering: Acid Flasks which explode inside a Bladestorm have 25% more radius per point and 10% more damage per point. Maximum 3 points.
- Longsword Slash: 15% increased area and 8% increased attack speed per point. Max 3 points.
- Strength of Arms: 25% increased area per point with a two handed weapon or bow and 6% increased hit rate per point while dual wielding. Max 2 points.
- Open the Armory: +2% critical chance per point per dagger, +20% bleed chance per point per one handed sword, +30% critical multiplier per point with a two handed sword. Max 2 points.
- Shadowstorm: Bladestorms hit by Shadow Cascade will instantly hit enemies in their area.
- Steelshaper’s Grit: +2% Critical Strike chance per point. Max 3 points.
Tempered Steel: 4% more hit damage and -1 Mana cost per point. Max 3 points. - Blade Detonation: When your Bladestorms collide, they are destroyed and each cause a Blade Detonation.
- Armed Response: You and allies hit by a Blade Detonation gain Haste for 1 second per point. Max 2 points.
- Lingering Fragments: Blade Detonations create Caltrops in the area. This effect can occur up to 4 times per point per 2 seconds. Max 3 points.
- Recovered Fragments: Standing within your Blade Shatters restores 2 Mana for each eruption.
- Nightblade: +10% chance on hit to inflict Shadow Daggers per point, doubled if the Bladestorm is inside a Smoke Bomb. Max 4 points.
- Heavy Weapon: 8% more damage per point. Max 4 points.
- Low Slash: +34% chance to slow on hit per point. Max 3 points.
- Sawtooth Blade: +25% chance to inflict bleed on hit per point. Max 4 points.
- Frostblade: Cold conversion, and Poison and bleed from all sources converted to frostbite.
- Toxin Dipped: Bleed chance from all sources converted to Poison.
Shadow Rend
Shadow Rend is a powerful attack with a slight windup, which creates a Shadow performing a repeat of your attack. Unlike most other Shadow-generating abilities, Shadow Rend can be used while wielding either melee weapons or bows.
- Base behavior of Shadow Rend is as follows:
- Perform a short dash attack and manifest a Shadow at your previous position, which will perform a sweeping melee attack or piercing bow attack for you after a short delay. The Shadow will persist afterwards for up to 5 seconds.
- 20 Mana cost.
- Shadows will imitate your next direct use of Shadow Cascade, Shurikens, Umbral Blades, Explosive Trap, or Acid Flask. Shadows can also imitate indirect uses of Shadow Cascade.
- Up to 3 Shadows can be active at once.
- The initial attack has 100% damage effectiveness, and the Shadow’s attack has 500% damage effectiveness.
- Modifiers to skills used by Shadows affect the Shadow’s attack.
- Shadow Rend unlocks at level 3.
- Tree Nodes:
- Intensity: 8% more damage per point. Max 4 points.
- Heavy Shadows: 12% more damage and 3% less attack speed per point. Max 3 points.
- Jagged Shadows: +25% bleed chance per point, doubled for the Shadow’s attack. Max 4 points.
- Darkened Blood: Bleed chance from all sources converted to Poison chance, and 1% more hit damage per Poison on the enemy, up to 30. Max 1 point.
- Shadow Massacre: Directly using Shadow Rend consumes all Shadows to make them imitate Multishot or Shadow Cascade depending on equipped weapon type. Each Shadow Cascade or Multishot imitated consumes 5 Mana. This node has no effect if Hidden Strength is allocated. Max 1 point.
- Unending Twilight: Up to 20% chance for Shadows consumed by Shadow Massacre to create a new Shadow afterwards, reaching maximum chance for Shadows that are at least 6 meters away from you. Max 3 points.
- Reconstitution: Shadows consumed by Shadow Massacre or Hidden Strength restore 1 health per 2 Dexterity per point. Max 2 points.
- Hidden Strength: Directly using Shadow Rend consumes all existing Shadows. It restores 2 Mana per point if you consume at least one Shadow. For each Shadow consumed after the first, it gains 20% more damage and 20% more melee area per point. Max 3 points.
- Dark Cloak: You have a 50% chance per point to gain a Dusk Shroud when you directly use Shadow Rend and hit at least one enemy with the Shadow’s attack. Max 2 points.
- Night’s Approach: Shadow Rend no longer moves you. The manifested Shadow dashes forward 5 meters in the target direction before attacking, and will choose a target within range upon arriving. Max 1 point.
- Betrayal of Flesh: The manifested Shadow chooses a random target to dash toward, ignoring your targeted direction. It can target enemies that are 40% further away. Max 1 point.
- Gathered Shadows: For every Dusk Shroud on you up to 20, the Shadow’s attack deals 1% more damage per point and grants 2 ward per point if it hits at least one enemy. Max 2 points.
- Precision: +2% Critical Strike chance per point. Max 4 points.
- Dusklight: Shadow Rend’s base Physical damage is converted to Lightning damage. Max 1 point.
- Illumination: +50% shock chance per point and +2% critical multiplier per point per shock on the enemy. Max 3 points.
- Eternal Darkness: +15% critical multiplier per point and +34% blind chance on hit per point. Max 3 points.
- Breaking Force: 12% increased melee area for the Shadow’s attack per point and +34% armor shred chance per point for the Shadow’s attack, doubled with a bow. Max 3 points.
- Hidden Blades: +50% Shadow Dagger chance for the Shadow’s attack per point. Max 4 points.
- Ghost Blades: Directly using Shadow Rend and hitting at least one enemy with the Shadow’s attack grants 1 stack of Ghost Blades per point, up to 9. Stacks of Ghost Blades are consumed 3 times per second while moving to throw a Ghost Blade at a nearby enemy. Ghost Blades apply Shadow Daggers on hit. +2 Mana cost per point. Max 3 points.
- Shadow Sequence: Traversal skills consume all stacks of Ghost Blades over their duration. Max 1 point.
- Ghastly Wounds: +34% frailty chance per point and +34% slow chance per point. Max 3 points.
- Exposed Weakness: +3% Physical penetration per point for each unique negative ailment on the enemy, up to 5. Max 3 points.
- Moon Frenzy: After directly using Shadow Rend you gain Frenzy for 1 second per point. Additionally, Shadow Rend deals 5% more damage per point while you have Frenzy. Max 3 points.
- Sinister Plan: While you are in a Smoke Bomb, Shadow Rend has 5% increased attack speed per point and -5 Mana cost per point. Max 2 points.
- Energy Flow: 6% increased attack speed per point and -1 Mana cost per point. Max 4 points.
- Pursuit: 6% more bow damage to damaged enemies, and Shadow Rend moves you forward if using a bow. Max 1 point.
- Shadow Rush: Shadow Rend is now a traversal skill with a 3 second cooldown. You dash up to 7 meters in the target direction after manifesting the Shadow. 50% more damage. Max 1 point.
- Flourish: Shadow Rend has an additional charge. Max 1 point.
- Loose Pockets: You have a 50% chance per point to throw Shurikens or Umbral Blades at the beginning and end of Shadow Rend’s movement, consuming 70% of the skill’s Mana cost each time. The skill chosen is the most recently directly used among them, or else random. Max 2 points.